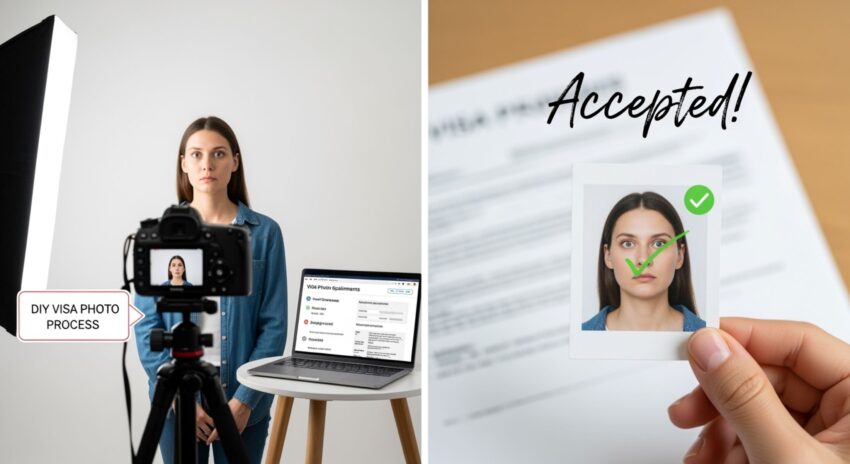
Applying for a visa can already feel like a mini rollercoaster ride — documents, forms, deadlines, and… yes, that perfect visa photo. We’ve all been there, standing in front of a camera at a photo studio, silently panicking about whether our hair looks right or if our ears are showing enough. But here’s the good news: you can skip the trip to the photo studio and take your visa photo right at home — and yes, if you do it correctly, it will be accepted. This guide will walk you step by step through everything you need to know — from setting up the perfect shot to meeting government requirements — so you can confidently submit a visa photo taken in your living room.
Why Consider Taking a Visa Photo at Home
Let’s face it — professional photo studios can be expensive, and sometimes the results aren’t even that great. You might spend a small fortune only to find the lighting is off, your expression looks awkward, or the background isn’t quite right. Taking a visa photo at home gives you the freedom to avoid all that stress while still producing a high-quality image. With just a few simple tools, you can create a photo that meets official requirements without breaking the bank.
One of the biggest advantages of doing it yourself is convenience. You don’t need to schedule appointments, wait in long lines, or rush through the process in an unfamiliar environment. Your home becomes your personal photo studio, and you can take the picture at a time that works best for you. This flexibility is especially helpful if you have a busy schedule or if local studios have limited hours.
Cost is another major factor. Professional studio fees can add up quickly, especially if you need multiple attempts to get the perfect shot. At home, you only need a camera or smartphone, some basic lighting, and a plain background. This approach can save you a significant amount of money, making the process more budget-friendly without sacrificing quality. Plus, you get full control over the results. You can experiment with different lighting, angles, and expressions until you capture a photo that you’re genuinely happy with — something that isn’t always possible in a studio setting.
Finally, taking a photo at home can speed up the process considerably. There’s no waiting for printed copies or scheduling additional appointments. Once you’ve taken and edited your photo to meet the required specifications, it’s ready for digital upload or printing immediately. This means your visa application can move forward faster, reducing delays caused by photo-related issues. However, it’s crucial to remember that visa authorities are very strict about photo standards, so attention to detail is essential. Even a small mistake in background, lighting, or expression can lead to rejection, so careful preparation is key.
Understanding Visa Photo Requirements
| Requirement | Typical Specification | Common Mistakes | Tips for Success | Additional Notes |
| Photo Size | 2 x 2 inches (51 x 51 mm) | Using larger or smaller prints, wrong cropping | Measure carefully and use cropping tools to match exact size | Digital photos must maintain proper aspect ratio |
| Background Color | Plain white or off-white | Patterns, shadows, colored walls | Use a plain wall, white sheet, or poster board for consistency | Avoid textured surfaces or gradients |
| Face Position | Centered, facing forward | Head tilted, off-center | Keep shoulders square, head straight, and eyes level | Make sure the full head fits within the frame |
| Expression | Neutral, no smiling | Smiling, frowning, raised eyebrows | Keep a calm, neutral look | Even slight smiles can lead to rejection |
| Eyes | Open and clearly visible | Hair covering eyes, squinting | Brush hair back, look directly at camera | Avoid glasses that reflect light or glare |
| Head Coverings | Allowed only for religious reasons | Hats, scarves without valid reason | Only wear head coverings if allowed | Must not obscure face or forehead |
| Glasses | Usually not allowed | Wearing glasses that reflect light | Remove glasses completely unless medically necessary | No tinted lenses |
| File Format | JPEG or PNG (digital uploads) | Wrong file type or oversized files | Save in required format and check file size | Check embassy/digital platform requirements |
| Resolution | At least 300 DPI | Blurry, low-resolution images | Use a high-resolution camera or phone camera | Ensures image remains sharp when printed or scanned |
| Lighting | Even, natural light preferred | Harsh shadows, overexposure | Use window light or soft lamps on both sides | Avoid direct flash |
Gather Your Tools
Taking a visa photo at home doesn’t require professional equipment, but having the right tools can make the process much smoother and increase the chances that your photo will be accepted. Here’s a detailed list of everything you should prepare before starting:
- A high-quality camera or smartphone – Your device should have at least 8 megapixels for a clear, sharp image. Modern smartphones usually suffice, but make sure the lens is clean and free of smudges.
- A tripod or stable surface – To avoid blurry photos, it’s crucial to keep your camera steady. A tripod is ideal, but if you don’t have one, placing your camera on a flat, stable surface like a table or shelf works just as well.
- A plain white or off-white background – Visa authorities require a neutral, distraction-free background. Use a bare wall, a white sheet, or a poster board to ensure your photo meets the guidelines. Avoid patterned walls, colorful textures, or shadows.
- Good lighting – Proper lighting is one of the most important aspects of a compliant visa photo. Natural light works best, so try to face a window with even, indirect sunlight. If natural light is insufficient, position two lamps at 45-degree angles to illuminate your face evenly and reduce shadows.
- Photo editing software – While optional, software can be extremely helpful for adjusting the size, cropping, or brightness of your photo. Basic programs like Photoshop, GIMP, or even online editors can ensure your photo matches the required specifications. Avoid over-editing; you should not alter your facial features, skin tone, or expressions.
- Measuring tools or guides – To ensure your head and shoulders are positioned correctly and the photo is the exact size required, use a ruler or digital guides. Some online photo tools provide automatic cropping to official dimensions, which can save a lot of hassle.
- Mirror or feedback system – To check your posture, head alignment, and facial expression, having a mirror nearby or asking a friend to review your setup can help ensure accuracy before taking the photo.
Set Up the Perfect Background
When it comes to taking a visa photo at home, the background is just as important as your expression or lighting. Visa authorities are very strict about requiring a plain, distraction-free background, typically white or off-white. Any patterns, textures, or colors can cause your photo to be rejected. That’s why setting up the perfect background is a critical step that shouldn’t be rushed or overlooked.
Start by evaluating the walls in your home. A bare wall with no decorations, picture frames, or patterns works best. If you don’t have a plain white wall, you can easily improvise by hanging a large white sheet, curtain, or poster board. Make sure the fabric is smooth and wrinkle-free so that it doesn’t create shadows or irregularities that might interfere with the photo. Avoid any materials with textures, stripes, or subtle designs, as even small distractions can be flagged by visa authorities.
Lighting plays a major role in how the background appears in your photo. Harsh shadows or uneven lighting can make a plain wall look messy and unprofessional. The best approach is to use natural light from a window, ideally facing you, so your face is evenly lit and the background appears consistent. If natural light isn’t enough, set up two lamps at 45-degree angles on either side to eliminate shadows and create a uniform appearance. This ensures the background looks smooth and meets official requirements.
Finally, consider the distance between you and the background. Standing too close can cast shadows, while being too far might make the photo feel disconnected. A good rule of thumb is to keep about one to two feet between your back and the wall. This small space helps avoid shadows, improves focus, and gives your photo a more professional appearance. By paying attention to these details, you can create a background that is completely compliant with visa standards and makes the photo-taking process much easier.
Get the Lighting Right
| Lighting Element | Recommended Setup | Common Mistakes | Tips for Success | Additional Notes |
| Natural Light | Stand facing a window for soft, even light | Standing with back to window, harsh sunlight | Use indirect sunlight for even illumination | Morning or late afternoon light is usually softer |
| Overhead Lighting | Avoid direct overhead lights | Creates shadows under eyes and nose | Turn off ceiling lights or supplement with side lamps | Can distort facial features in the photo |
| Side Lamps | Place two lamps at 45° angles from your face | Using only one lamp or uneven lighting | Position lamps at equal distance and height | Use soft, diffused bulbs to reduce harsh shadows |
| Flash | Avoid using the camera flash if possible | Flash can create glare and shiny spots | Rely on natural or lamp light instead | If flash is necessary, diffuse it with tissue |
| Shadow Control | Ensure no shadows behind or on your face | Shadows from hair, hands, or objects | Step a foot or two away from the background | Shadows can lead to photo rejection |
| Light Intensity | Bright enough to show facial details clearly | Too dim or overly bright | Adjust lamp brightness or window blinds as needed | Check photo preview to ensure even illumination |
| Color Temperature | Neutral, daylight-balanced light is best | Yellow/orange indoor lighting can distort colors | Use daylight bulbs or adjust white balance in camera settings | Helps maintain natural skin tone |
| Diffusion | Soften light to avoid hotspots | Direct, harsh light causing glare or shiny skin | Use sheer curtains, white sheets, or lampshades | Creates even and flattering lighting for the photo |
Position Yourself Correctly
Proper positioning is essential for a visa photo to be accepted. Even a perfectly lit photo with the right background can be rejected if your posture or alignment is off. Here’s a detailed guide to help you position yourself correctly at home:
- Maintain distance from the background – Stand about 1–2 feet away from the wall or backdrop. This helps reduce shadows behind your head and shoulders, making the photo look clean and compliant.
- Keep your shoulders straight – Stand upright with your shoulders squared to the camera. Slouching or leaning can distort your head-to-body ratio and make the photo look unprofessional.
- Face the camera directly – Your face should be fully visible and looking straight at the camera. Avoid turning your head to the side or angling your face, as this can violate visa photo requirements.
- Center your head in the frame – Make sure your head is positioned in the middle of the photo. Both sides of your face should have equal space from the frame edges. This ensures proper composition and meets official guidelines.
- Keep a neutral head position – Do not tilt, lean, or lift your head. A neutral, straight-on position is required to comply with biometric standards.
- Avoid squinting or exaggerated expressions – Your eyes should be fully open and looking directly at the lens. Squinting or raising eyebrows can result in rejection.
- Even weight distribution – Stand evenly on both feet and avoid leaning to one side. This helps maintain natural alignment of your torso and face in the photo.
- Check alignment with reference points – Use the grid feature on your camera or smartphone to ensure your eyes are level and your head is centered. This can prevent cropping issues later.
- Adjust posture gradually – Take a few test shots and make small adjustments until your head, shoulders, and eyes are perfectly aligned. Multiple attempts increase the likelihood of getting a compliant shot.
- Stay relaxed but alert – A tense posture can make your photo look stiff, while too relaxed a pose may slouch your shoulders. Find a balance that keeps you upright and natural-looking.